Getting started
Google I/O Edition
At Google I/O 2026, Synaptics and Google Research introduced the Coralboard™ Series, a new edge AI development kit family that makes prototyping powerful AI-enabled products at low power even more accessible to developers.
A small number of limited-edition boards were made available to some lucky developers at Google I/O. Read More.
If you received one of these boards, this information is for you.
Quick Overview
Configurations
The Synaptics Coralboard™ Google I/O Edition is designed to be highly capable in a headless configuration without a display. In the headless configuration, you will need to connect to the Coralboard from your host machine and interact with it entirely through a command-line interface (CLI) using a terminal window.
If your project requires a visual interface, Coralboard Google I/O Edition also supports display configuration with an optional MIPI DSI display. For more details on compatible displays, pinouts, and hardware configuration, refer to the User Guide.
Default Operating system
The Google I/O Edition kit comes preloaded with a version of Astra SDK (Yocto-project Linux) in an eMMC flash-storage. The image includes core and connectivity services, multimedia pipelines, Python 3, and a graphical desktop.
You can get started with the default operating system, but we recommend you update for the best experience. See User Guide for details.
Setup
The Google I/O Edition kit includes a few accessories for the Coralboard so you can experiment with on-device AI models. Some assembly is required, so follow these steps to get started.
1. What's in the box?
- Synaptics Coralboard Google I/O Edition (2GB)
- Sensor add-on accessory board
- CSI camera module
- CSI flex ribbon cable
You will also need (not included): A Phillips #0 screwdriver and a USB-C cable to connect your machine.
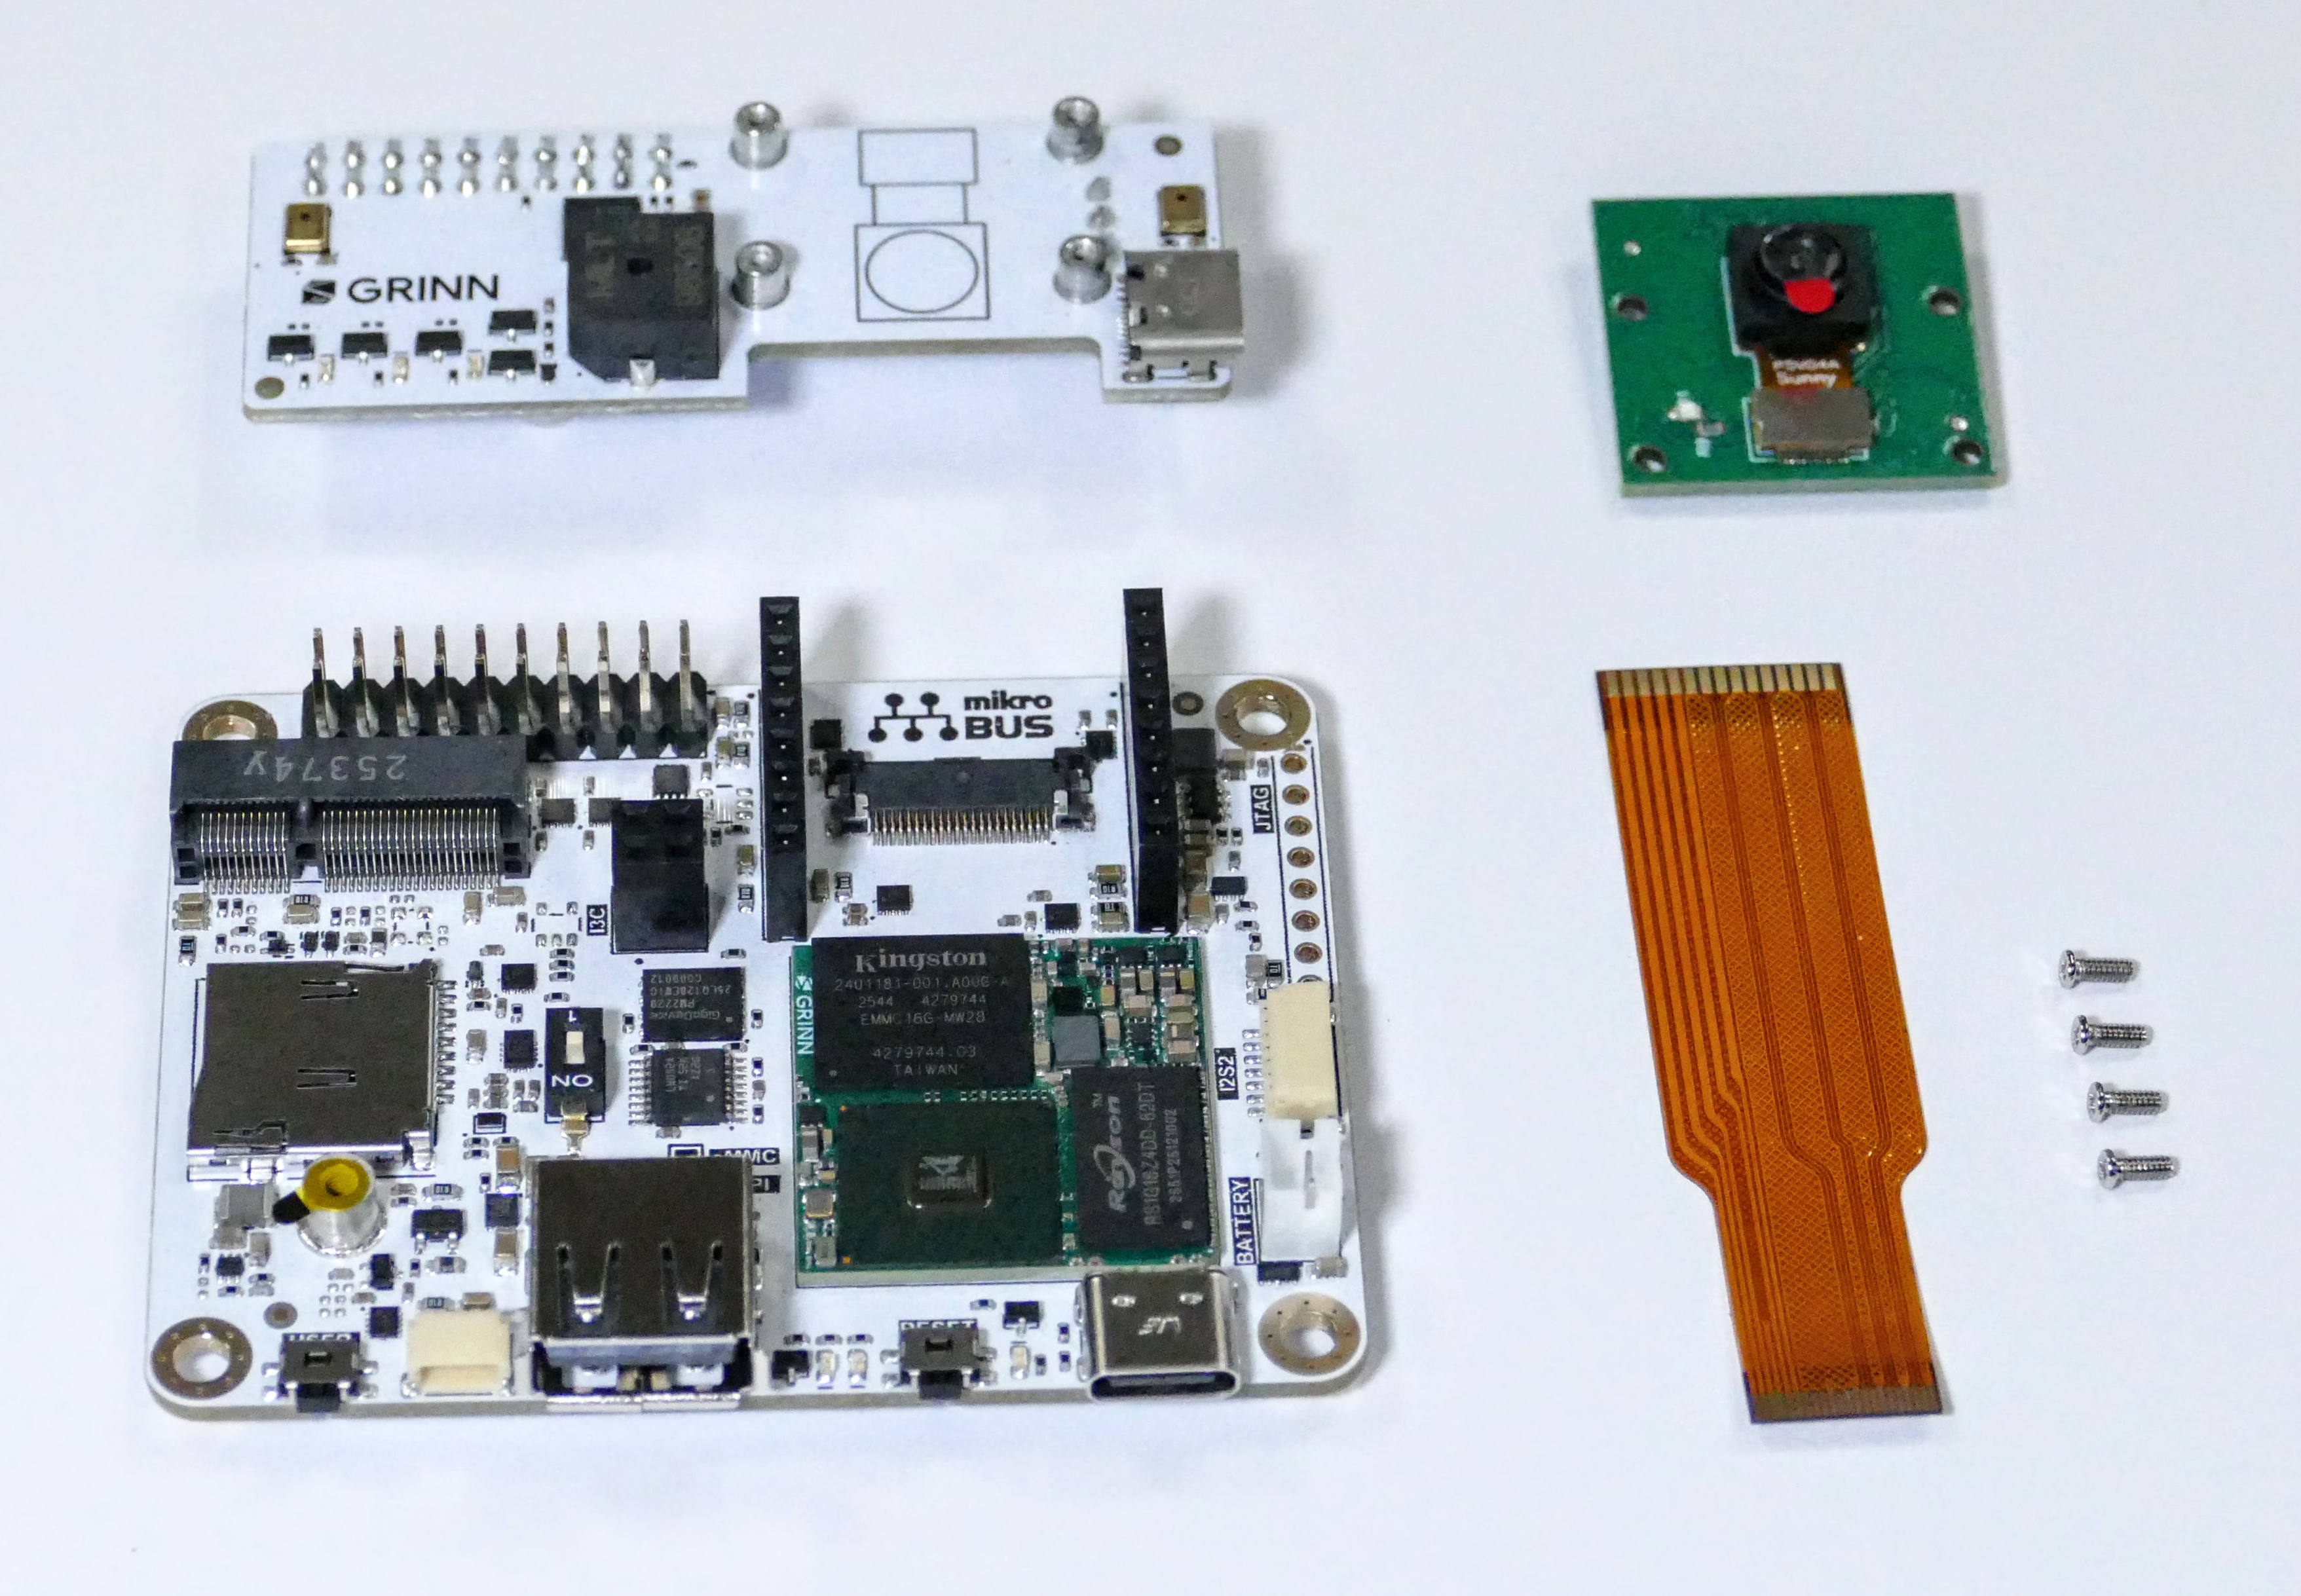
2. Assemble the sensor add-on
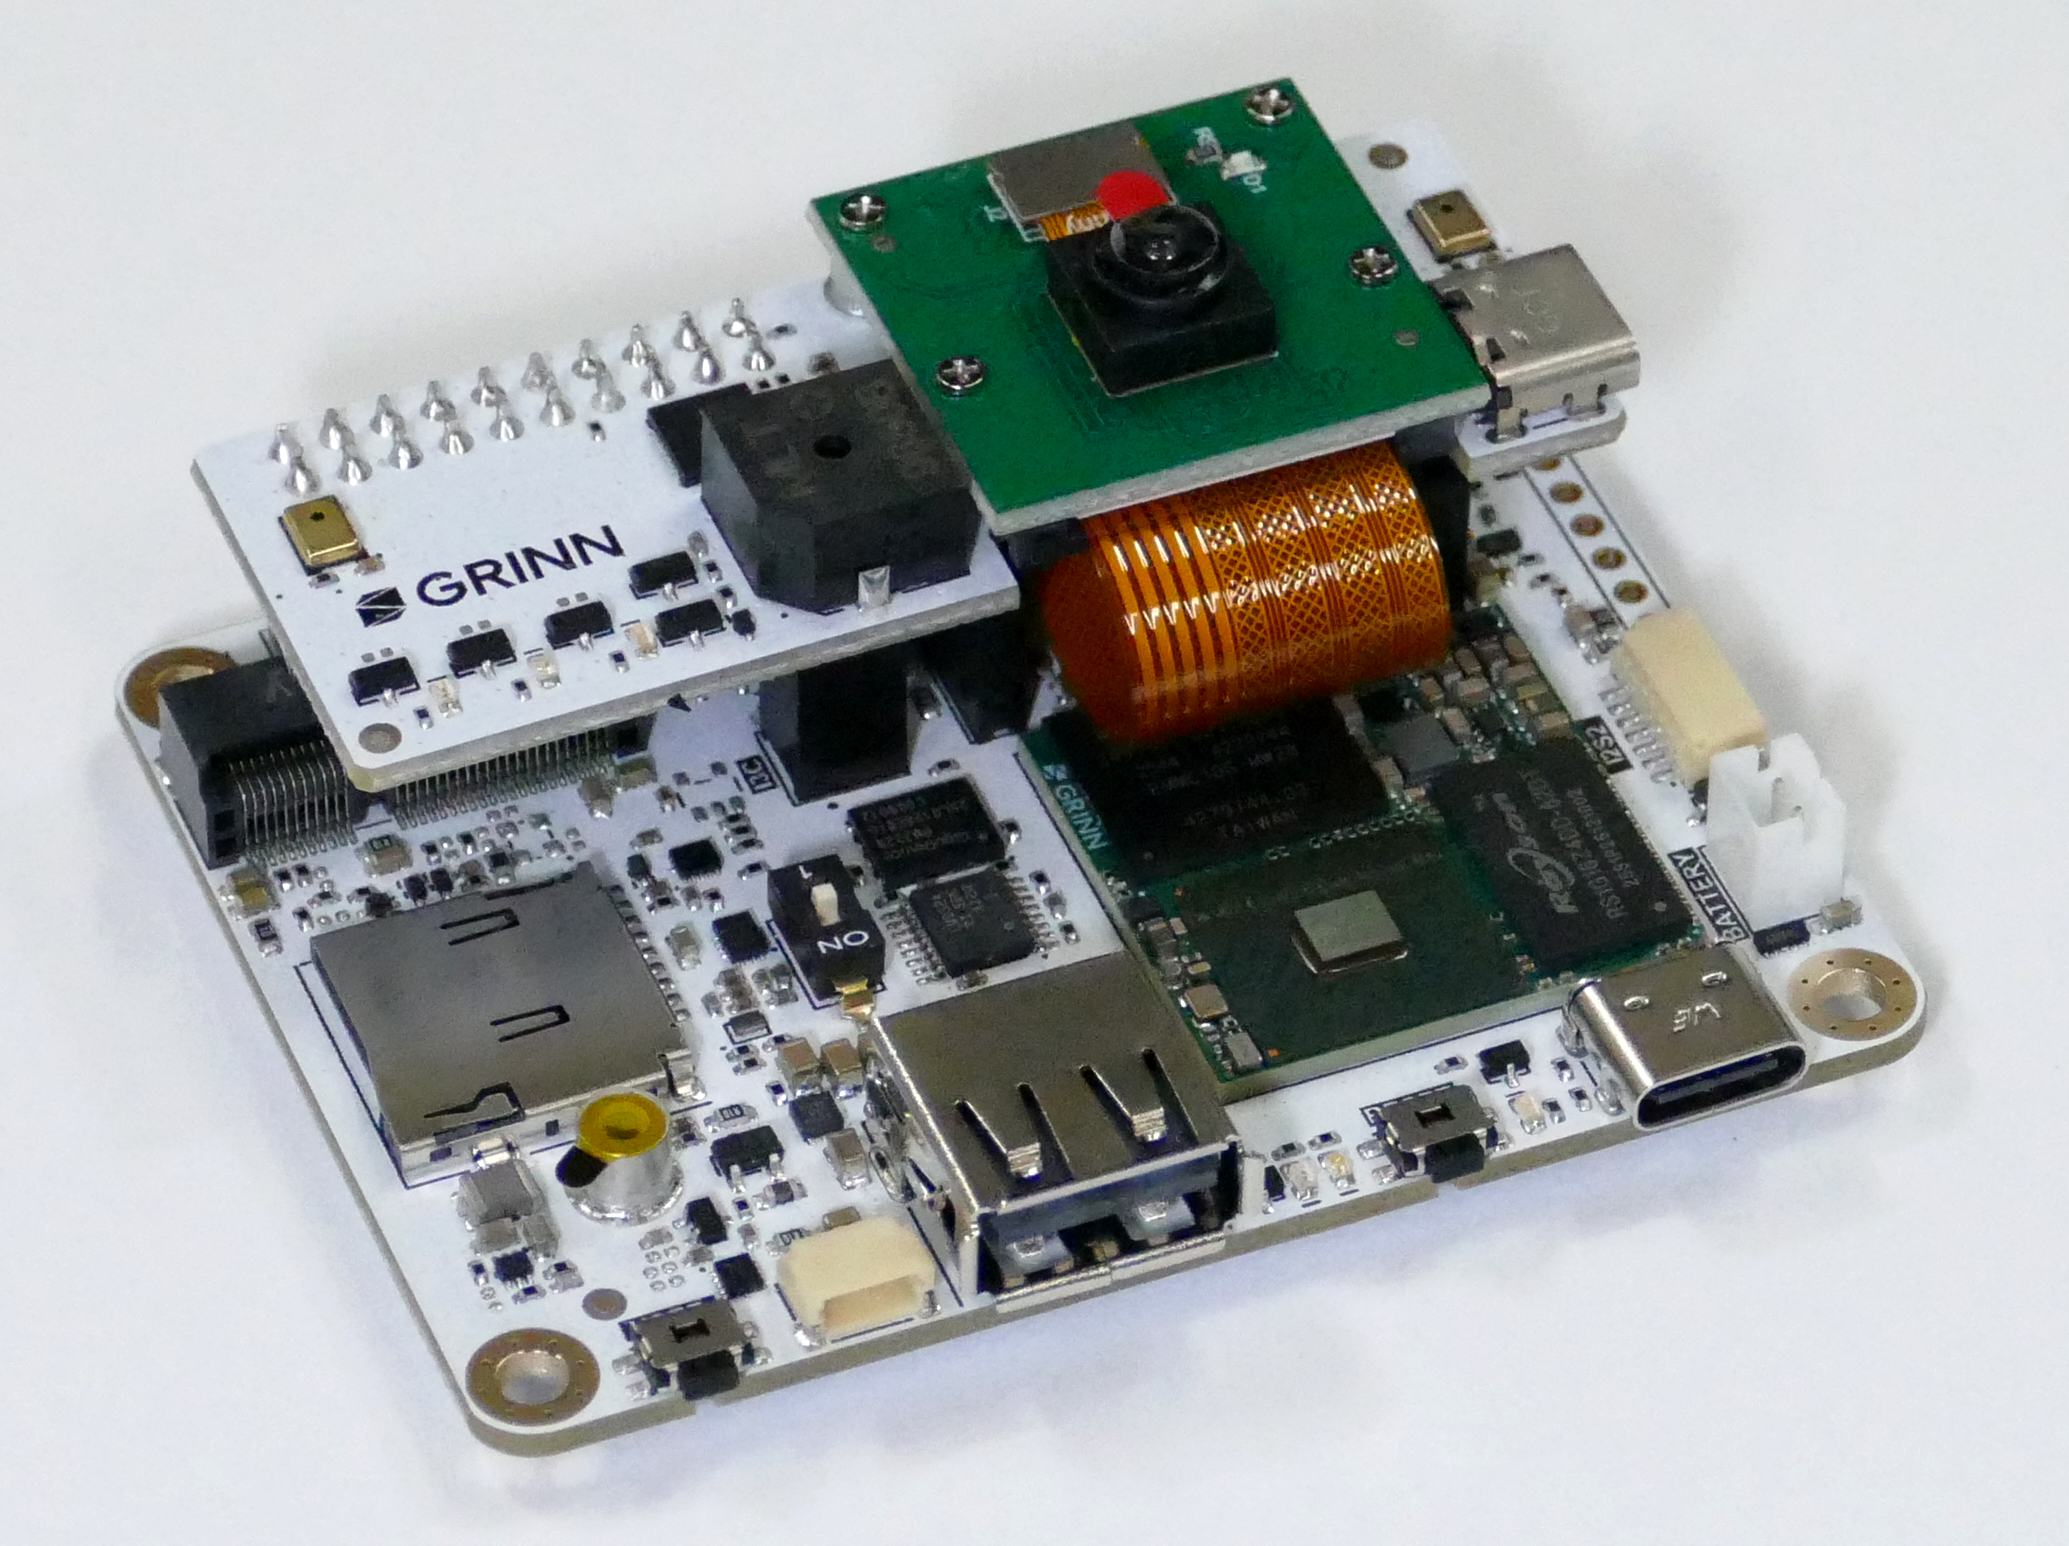
Included with the Google I/O edition only, the sensor Add-On is an optional accessory that attaches to the Coralboard. The sensor add-on adds a camera for capturing images, two microphones for capturing audio, a piezo buzzer for sound output, and a few LEDs as programmable indicators.
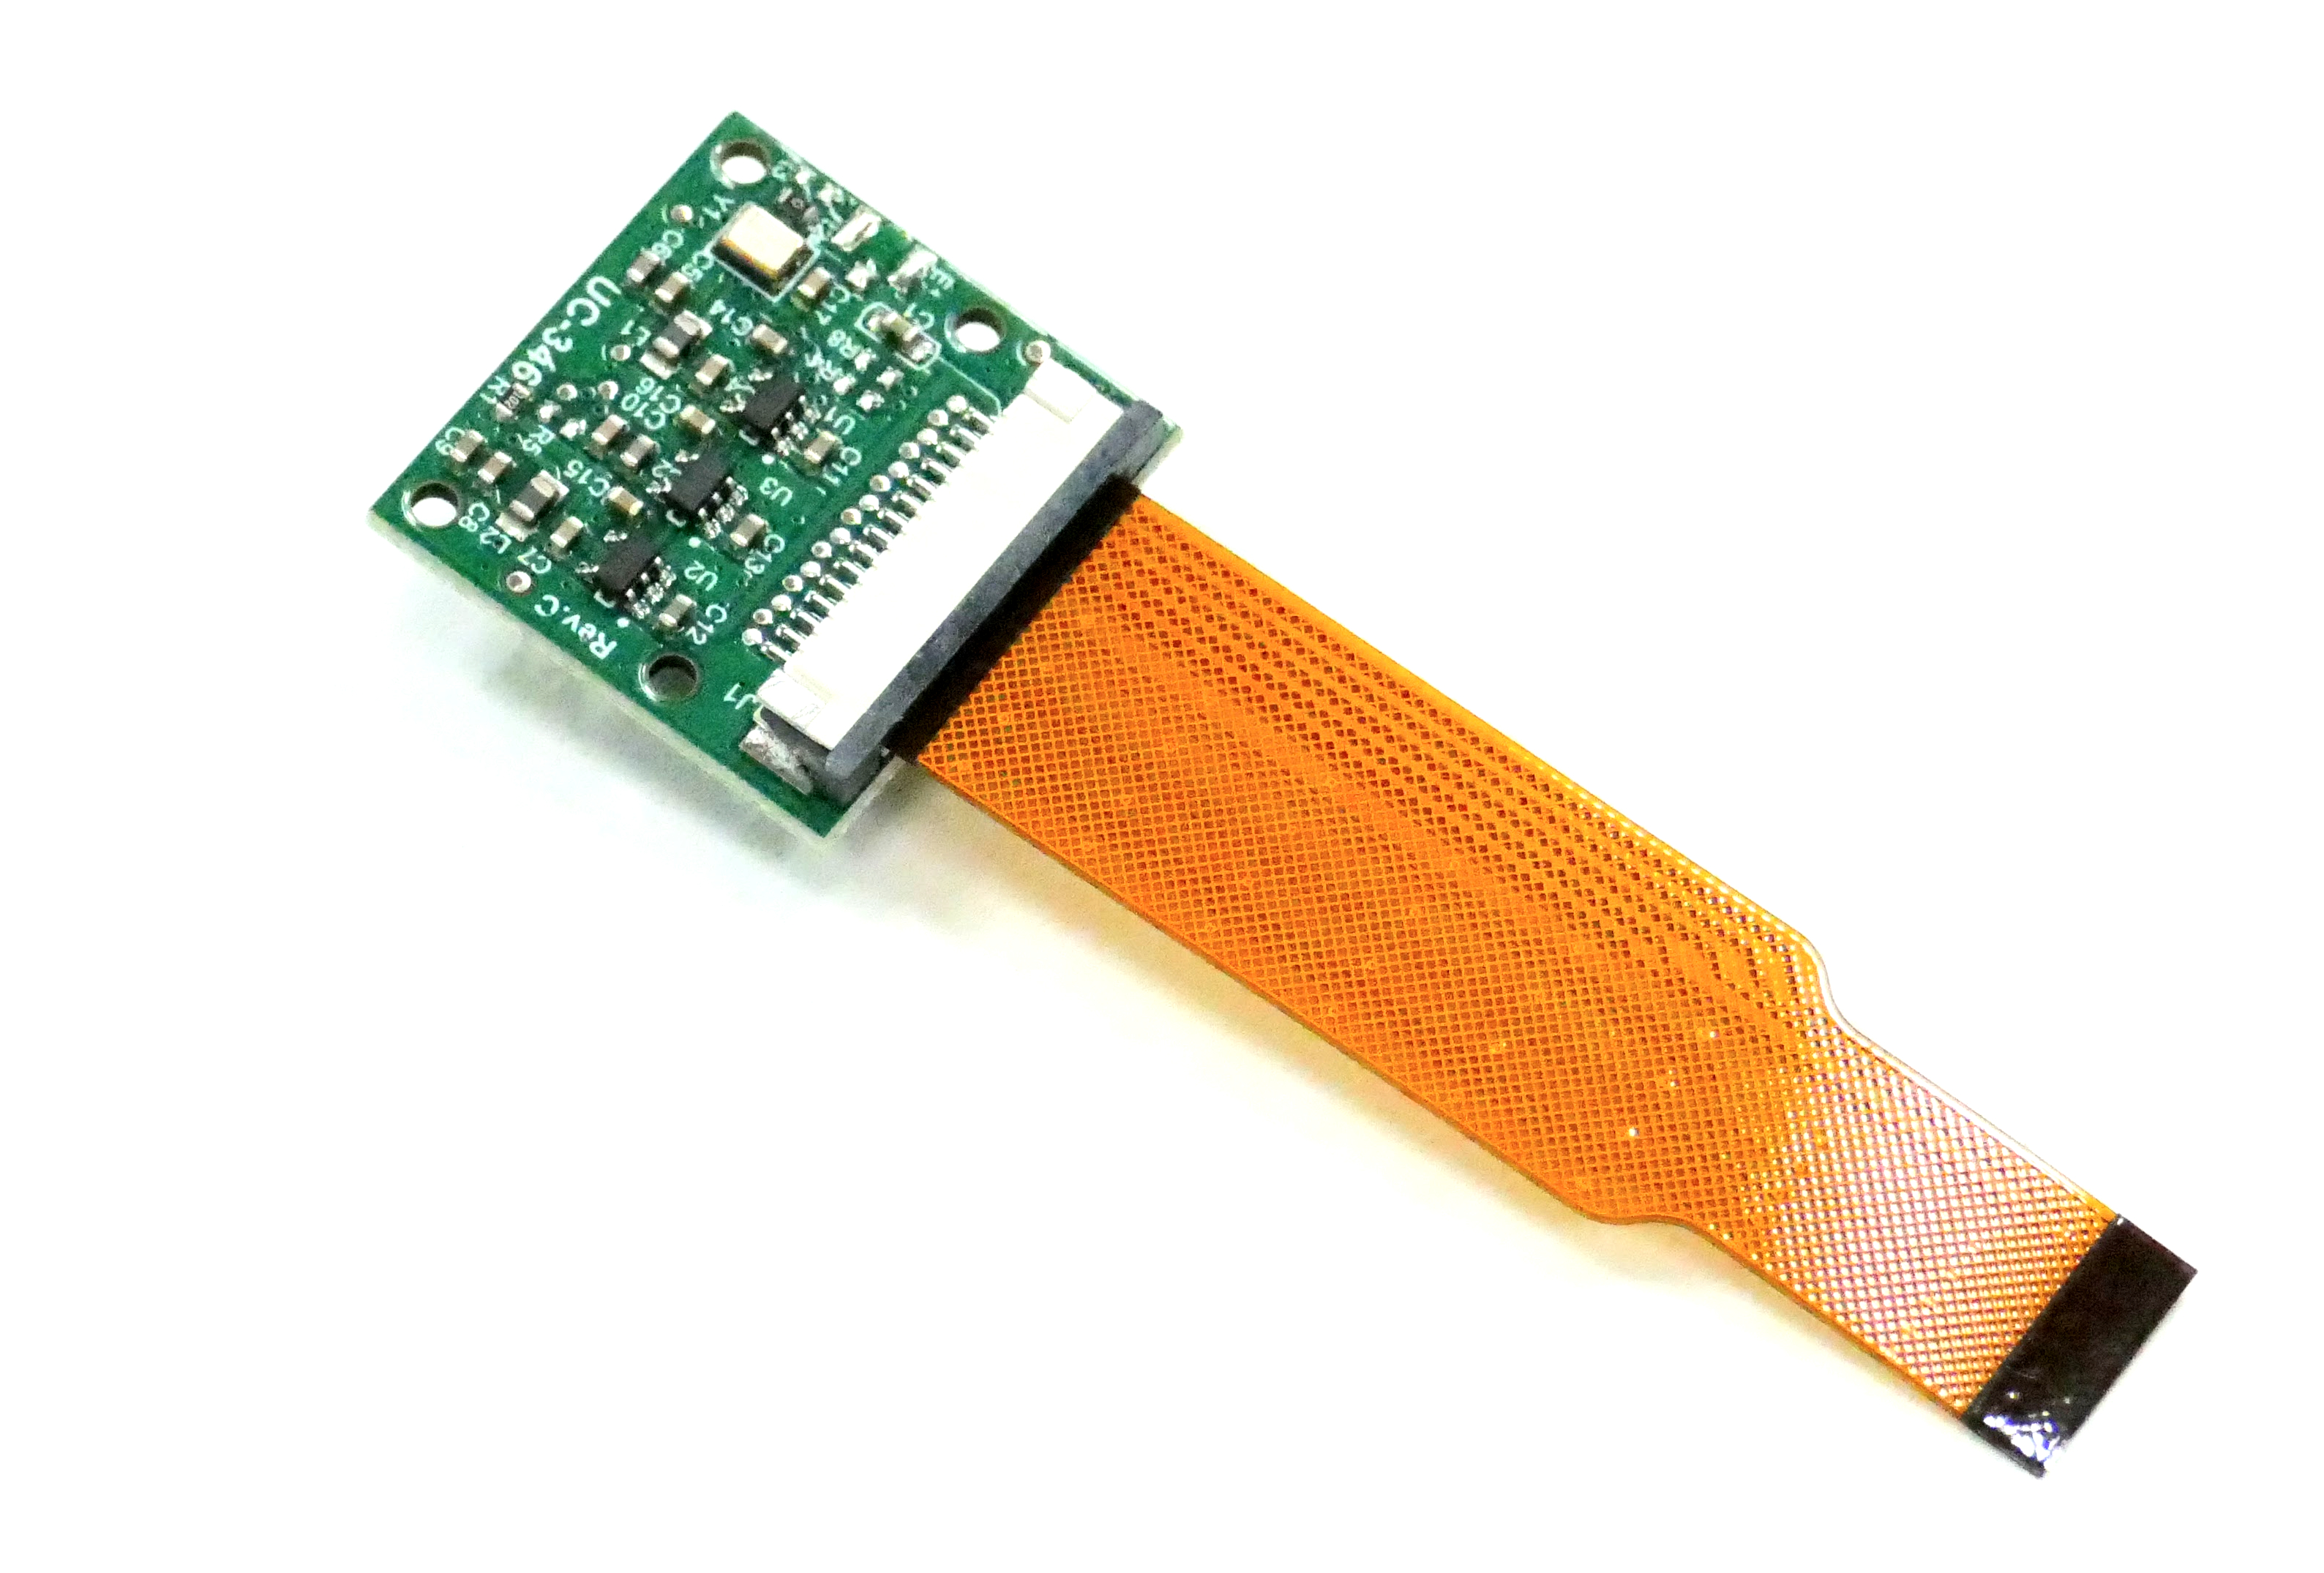
Connect the camera module: First, plug the flex ribbon cable into the camera module. Pull the lock bar, insert the flex cable as shown, and push the lock bar back in to secure the flex.
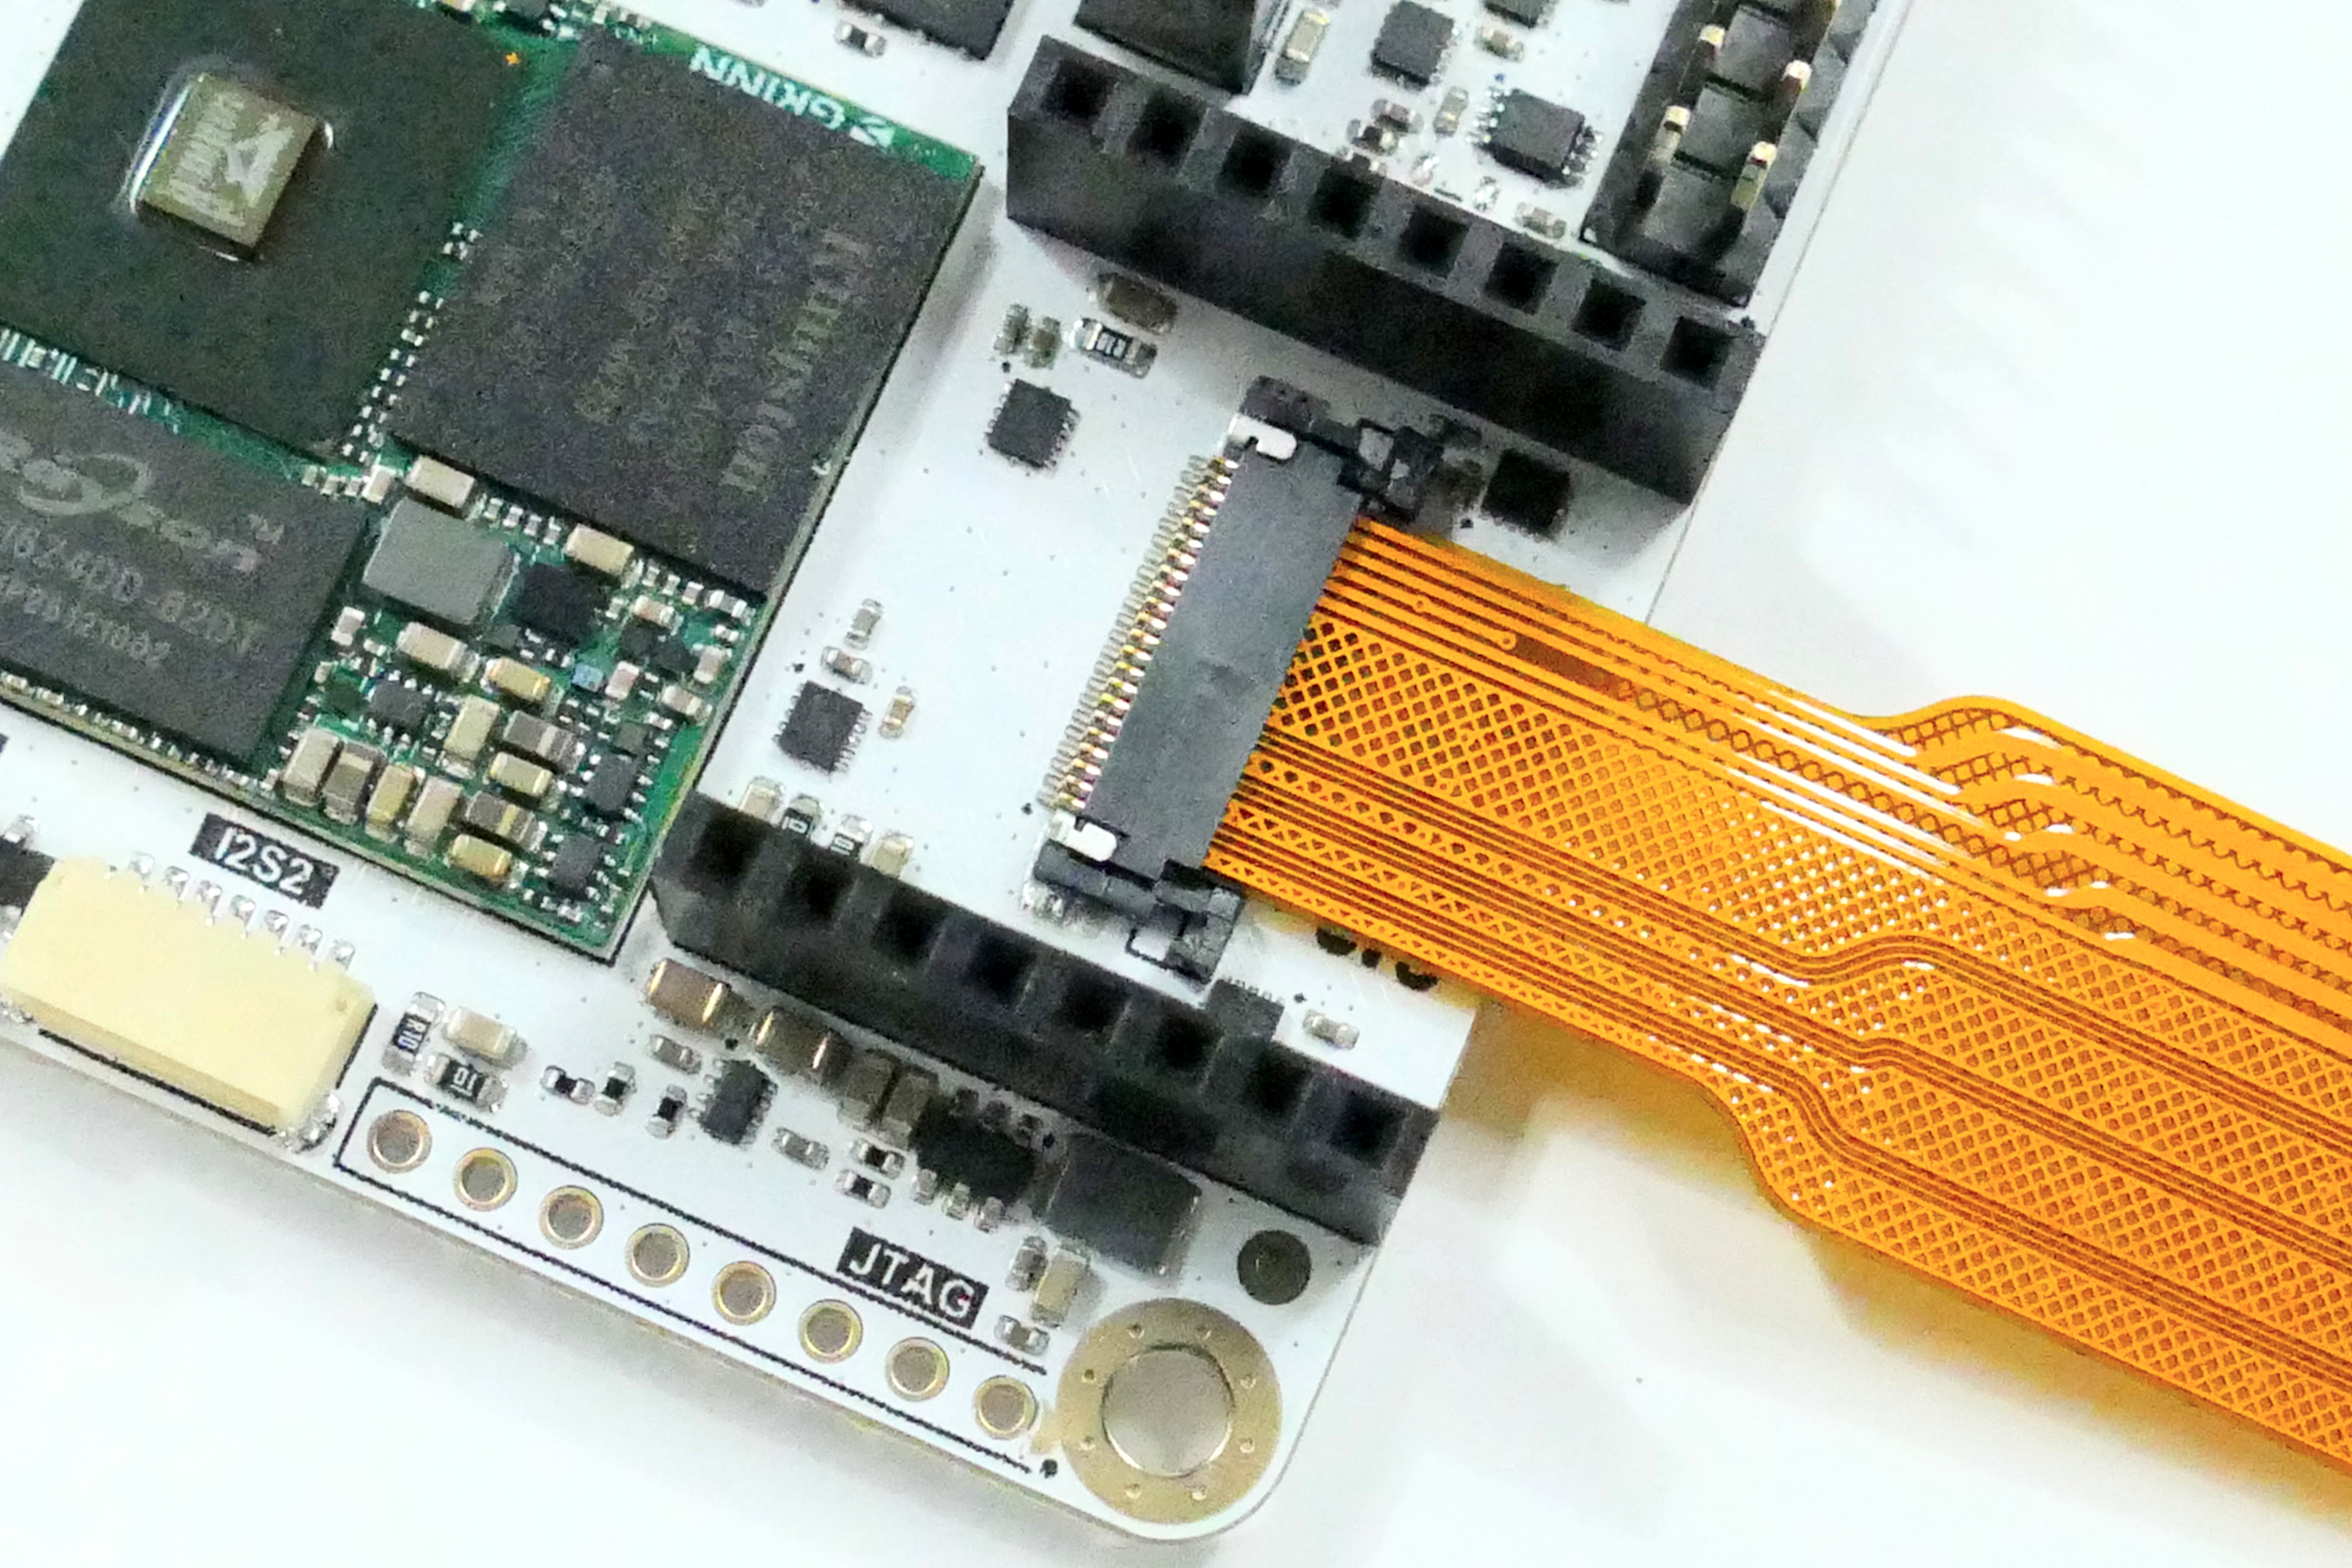
Connect to the Coralboard: Next, plug the other end of the ribbon cable into the CSI connector on the main Coralboard (located between the two sides of the mikroBUS™ socket). Pull the lock bar, insert the flex cable as shown, and push the lock bar to secure it.
Mount the camera: Place the camera module on the dedicated position mounts on the add-on board and use the four provided M1.6 screws to secure it.
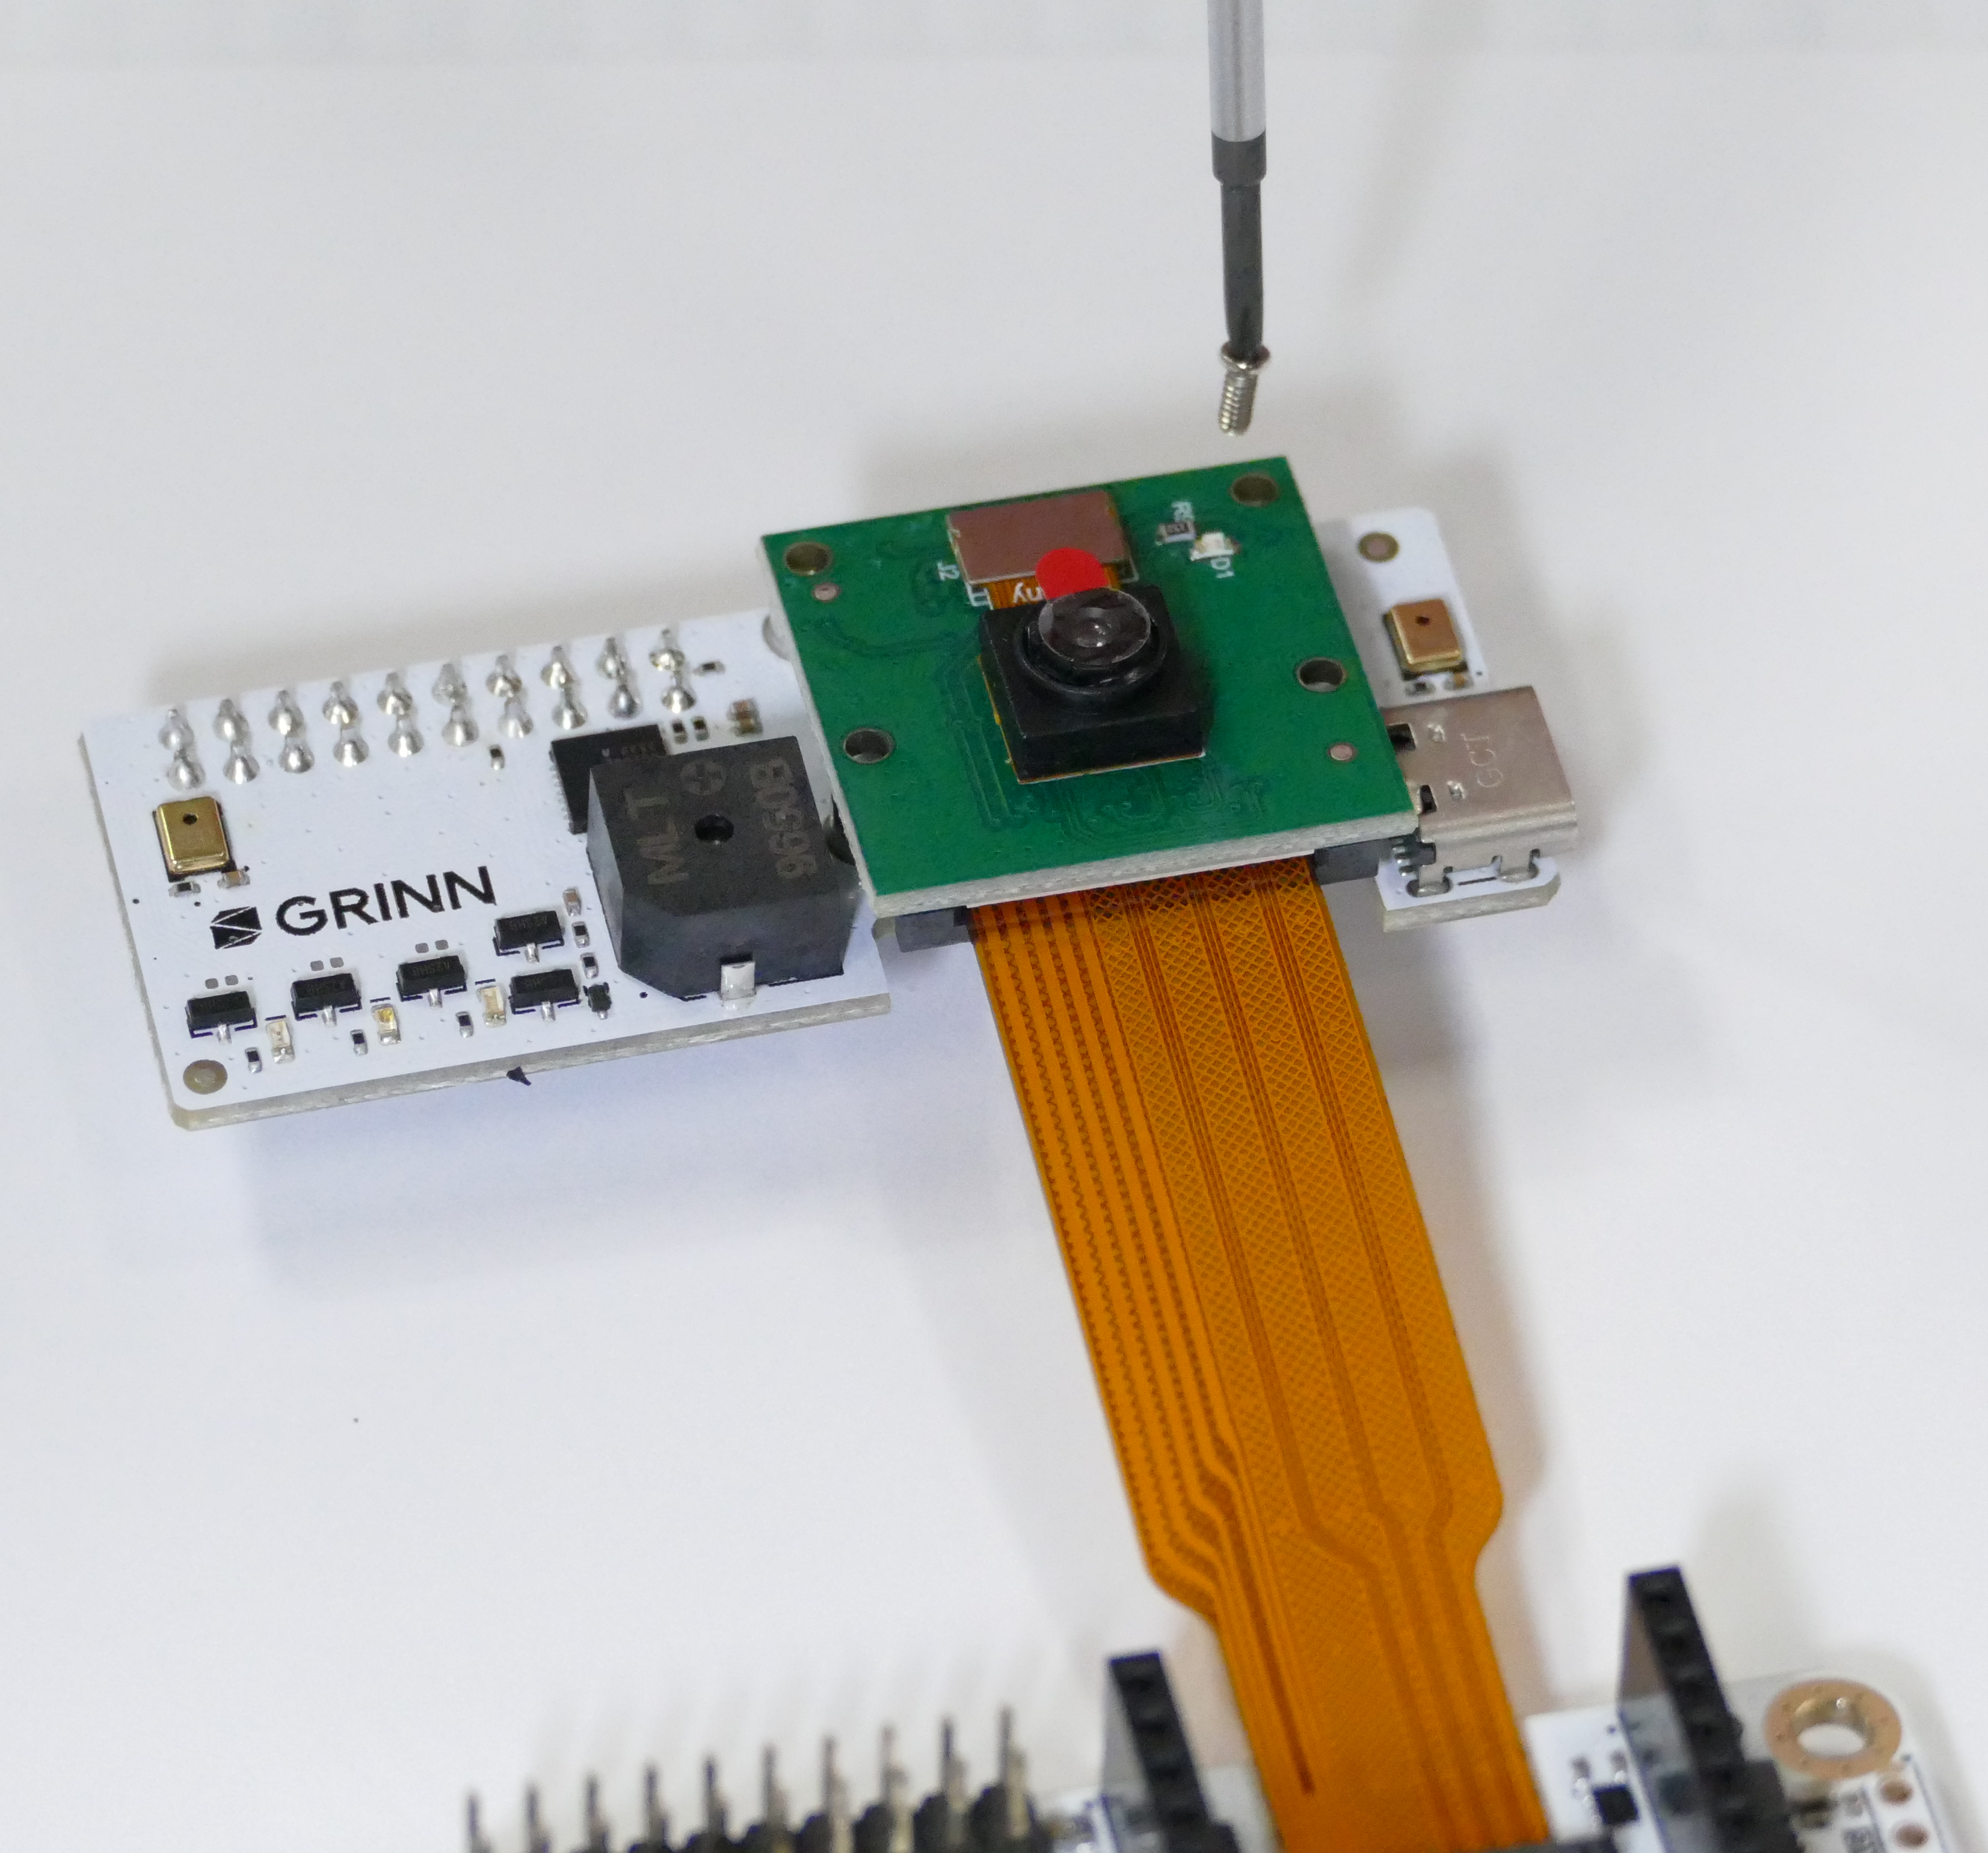
Attach the HAT: Plug the add-on board down onto the Coralboard. The camera should be facing up (outward) with the flex cable folded neatly under the add-on board as shown.
3. Connect and boot up
Boot Switch Configuration
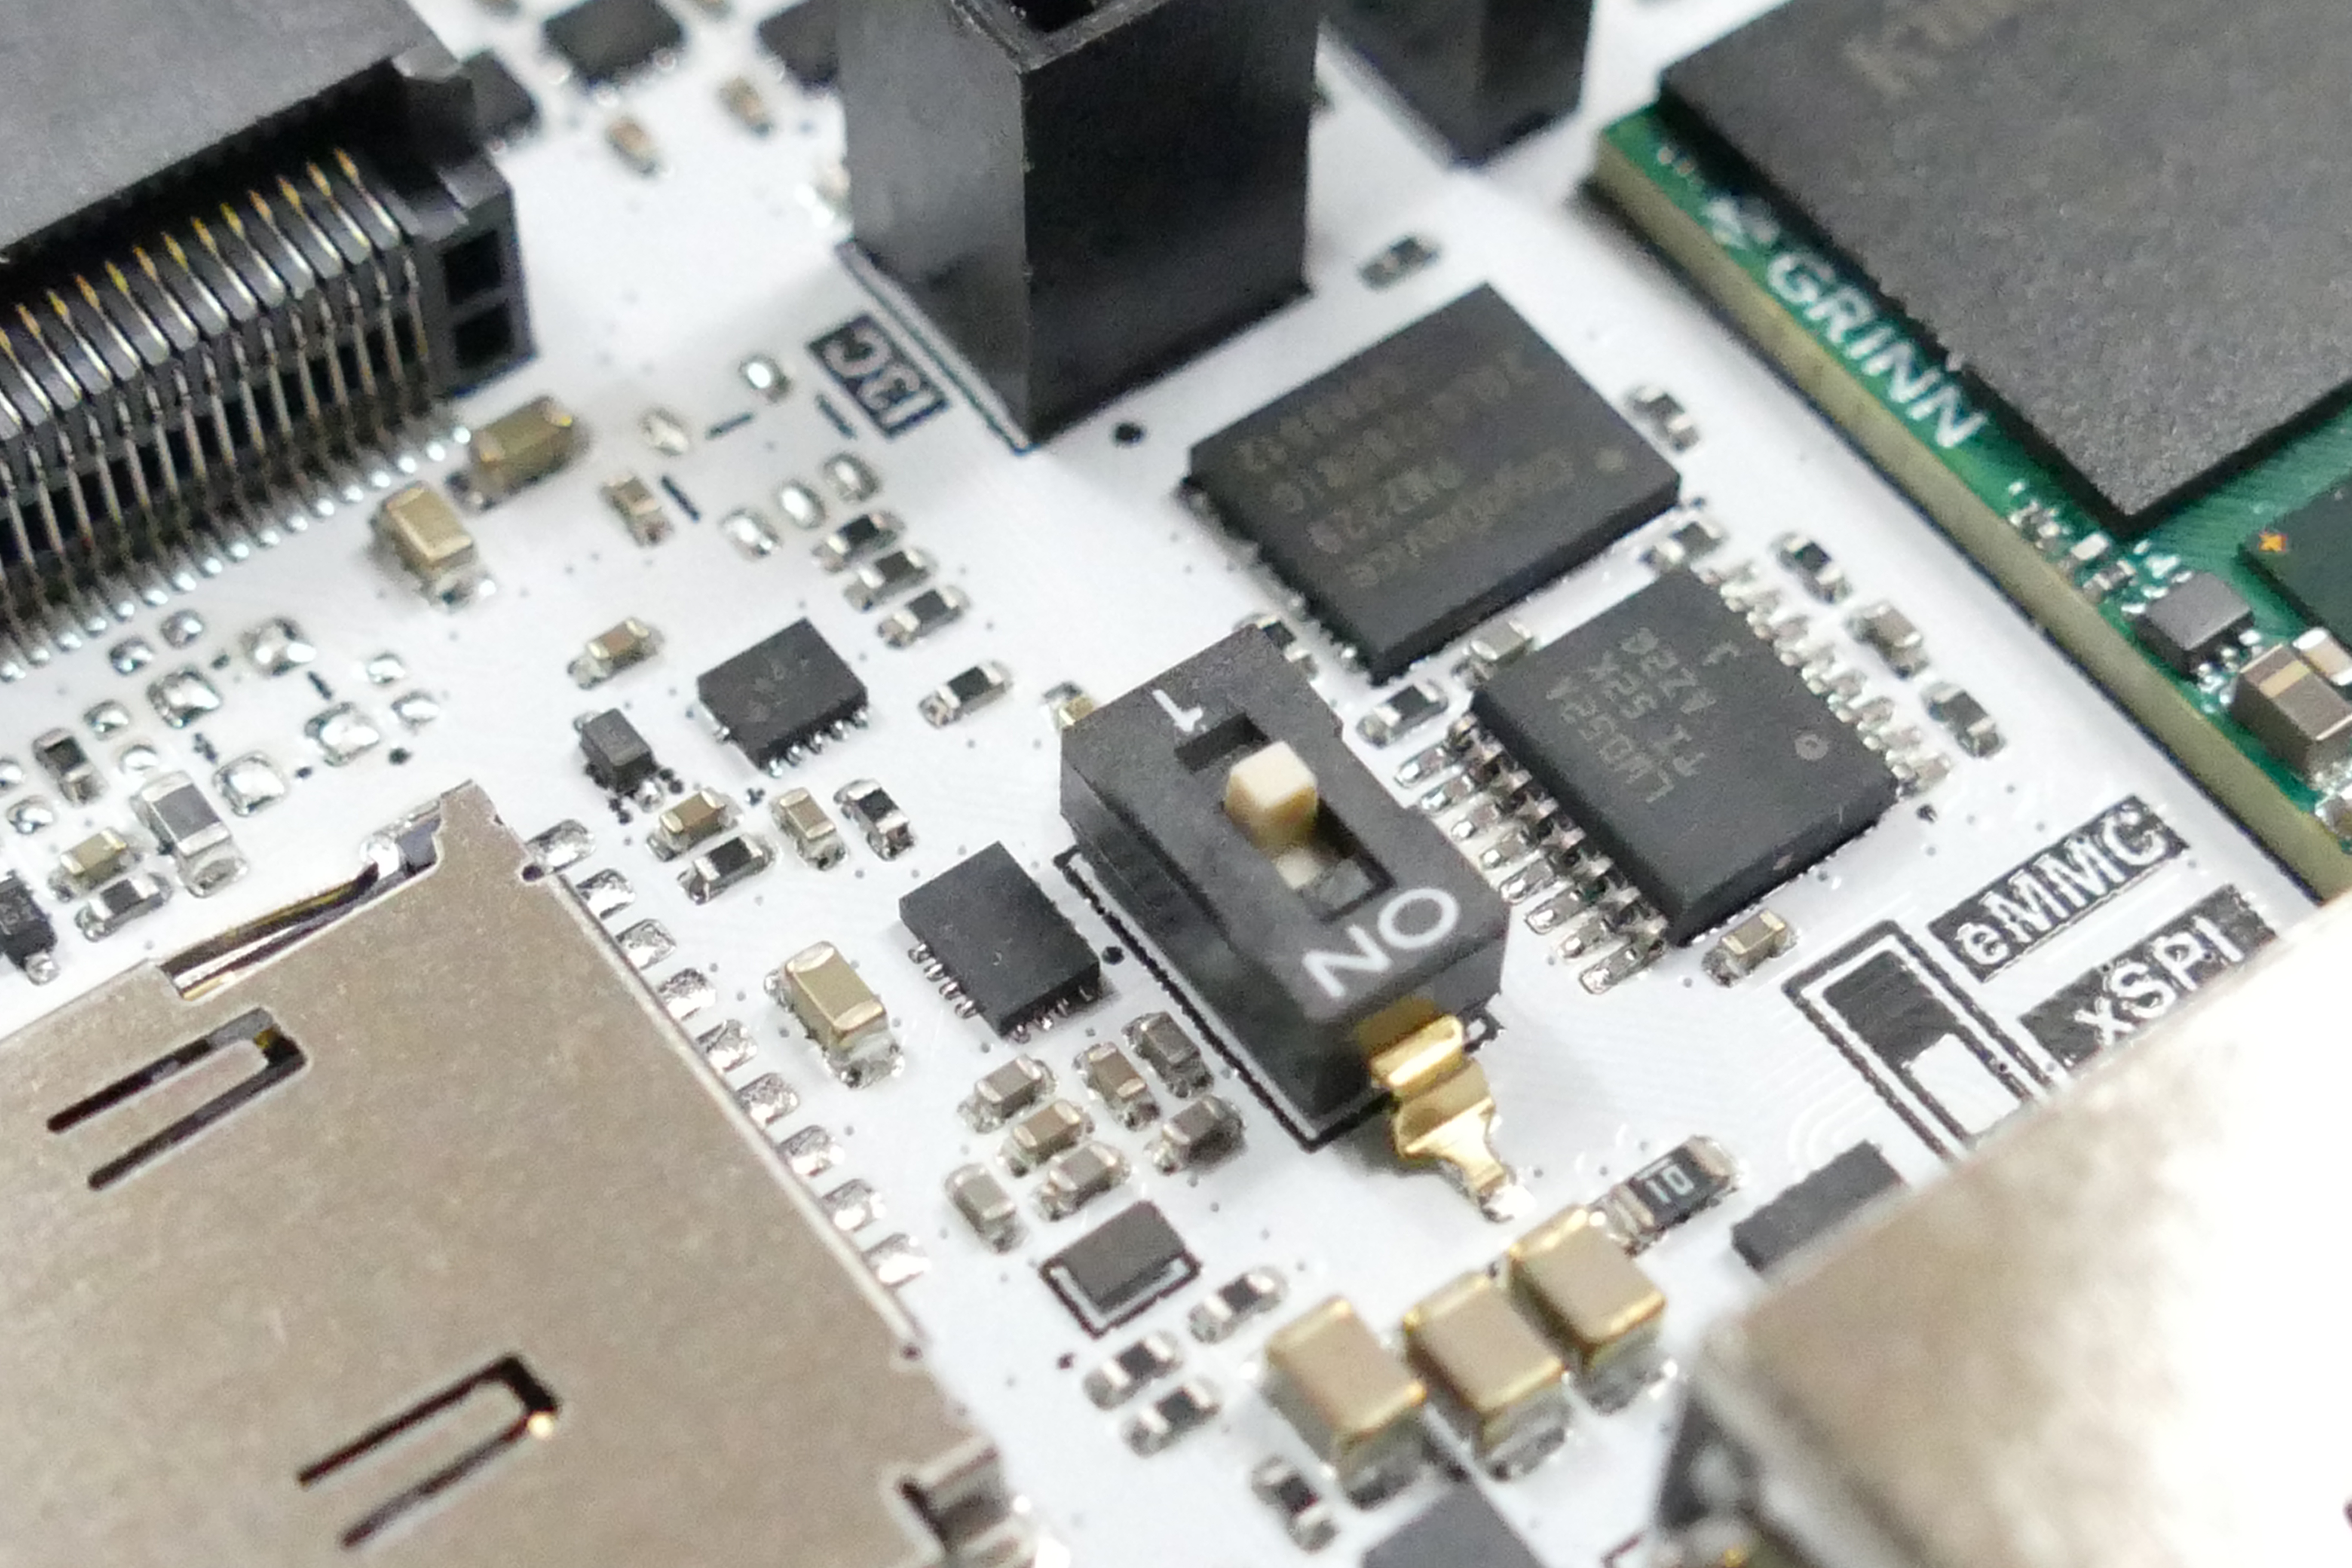
Coralboard includes a physical switch that determines the location of the software boot image. It can be loaded from the eMMC memory (default) or from an SD card (optional). Ensure the switch is set to the '1' position as shown in the image.
- 1: eMMC boot (default, this is the OFF position)
- ON: SD card boot (optional, not supported out-of-the-box)
Power the Coralboard
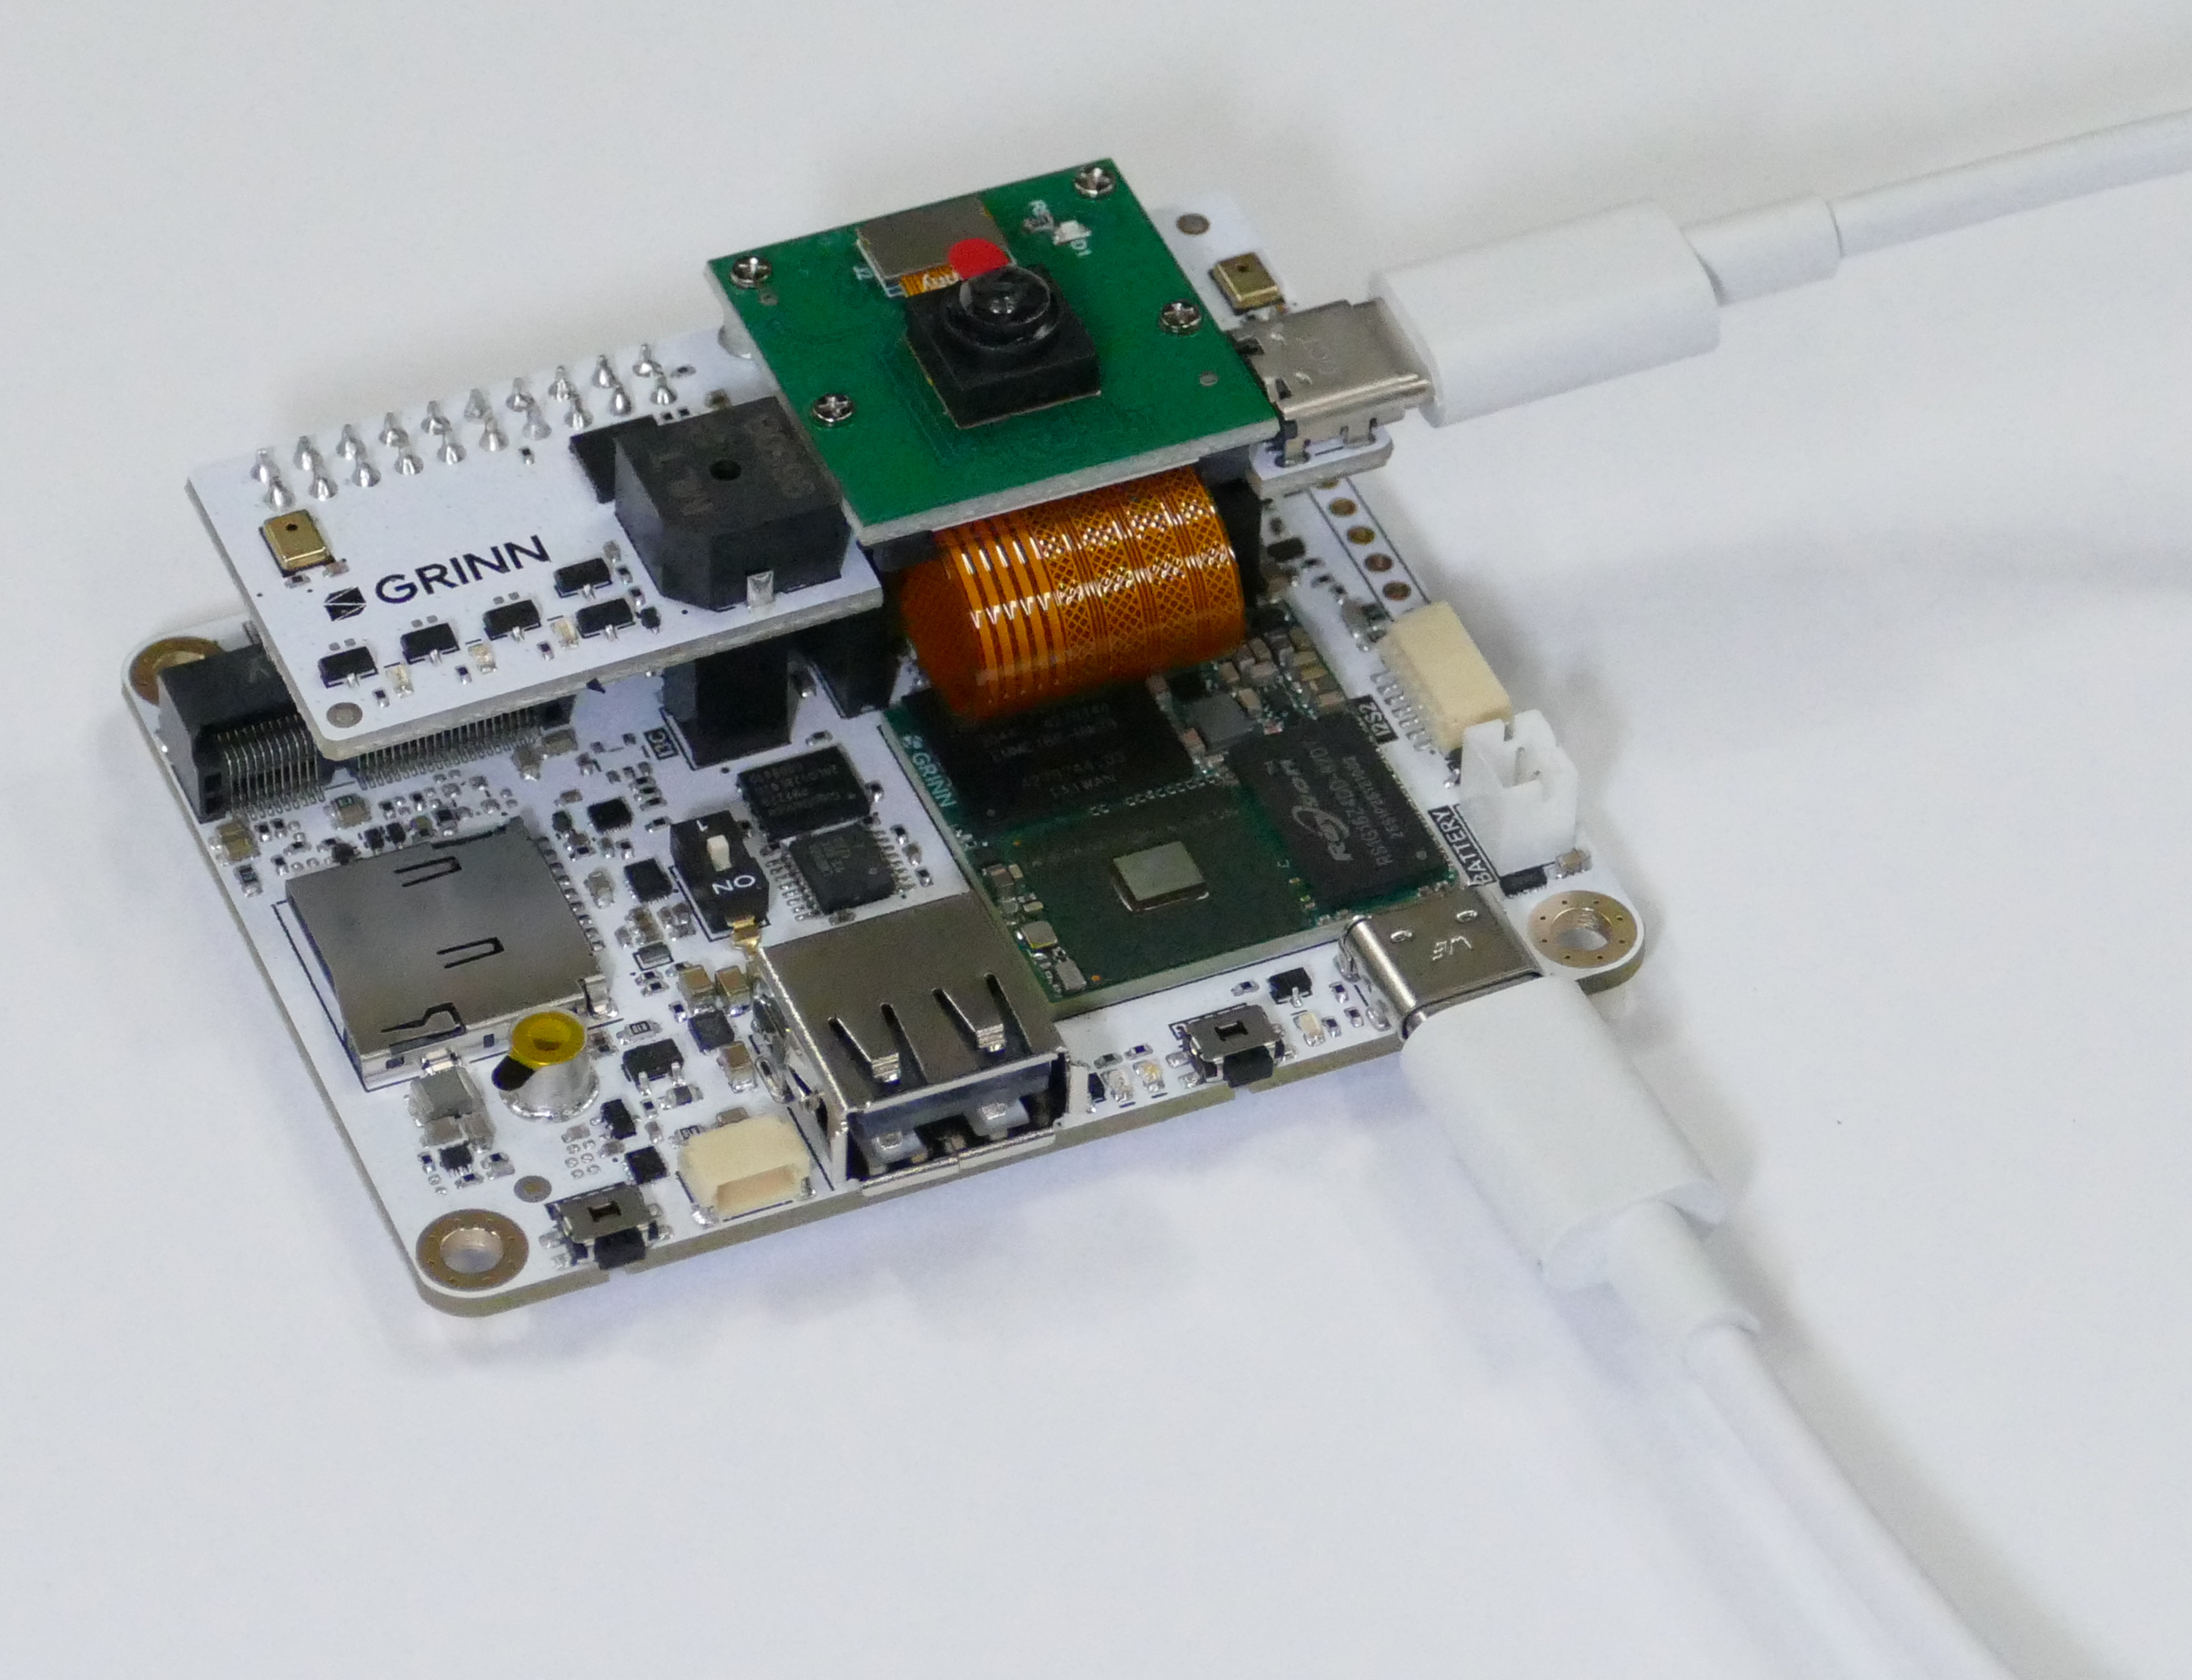
Coralboard is powered through a USB-C connector located in the lower right-hand corner of the board. This power may be supplied through a connection to a host machine (where a data connection is desired) or a USB-C power supply.
Status LEDs
Coralboard features three status LEDs to help you monitor operation:
- Green LED: Power indicator (always on when powered up)
- Red LED: Heartbeat indicator (two short blinks with a delay)
- Blue LED: IO indicator (sporadic based on memory access)
4. Open a terminal and log in
In the headless configuration, you will access the operating system using a terminal window using one of two options:
Option 1 - Use the Android ADB Interface (via the host USB-C cable) - Recommended
On your host machine, download Android SDK Platform-Tools and see details on using the ADB interface
Open a terminal on your host machine and use the following command to open a shell:
adb shell
Option 2 - Use the USB-to-Serial adapter included with the sensor add-on
To connect to the Coralboard using the sensor add-on, plug a USB-C data cable directly from the add-on to your host machine, open your preferred terminal emulator and connect using the designated serial port set to a baud rate of 115200.
Login:
- Login: root
- Password: (none)
See the User Guide for more details about connecting to serial.
5. Connect to a network (recommended)
For the best experience, we recommend you connect your Coralboard to a network. There are a few different methods but we recommend using Network Sharing through the USB port.
Option 1 USB Network sharing
Requirements:
- Host machine that supports network sharing
Follow these steps:
- With the USB type C cable connected, enable network sharing on your host machine (the method depends on your machine type - Windows, macOS, or Linux supported, see User Guide for details).
- Share the network to the "NCM".
Option 2 Wi-Fi Module
If you have an m.2 Wi-Fi module then see the User Guide for more details on how to enable it.
6. Try out the AI demos!
Once you have successfully logged into the terminal, and connected to a network, download example applications to start experimenting with on-device AI.
Each demo application is organized into its own subdirectory. Navigate to any of the subdirectories and open its README file for specific execution instructions and details. Available Demo Subdirectories:
gemma_translate-- Text translation using Gemmajellectronica-- Interactive audio and sensor demoobject_detection-- Real-time object identification using the cameraFunction_calling-- LLM tool use and function calling workflowsimage_classification-- Image categorization modelsscene_description-- Describe images using a VLM- and more
For more on each of these applications, head over to the Demos page.
To obtain the examples, connect to a Coralboard terminal and clone the examples to the home directory.
    cd /home/root
    git clone https://github.com/synaptics-astra-demos/sl2610-examples
Follow the instructions in the top level README.md to get started.
    cd sl2610-examples
    more README.md
Each example has an option to run with or without a display. See README.md for details.
Can't get online?
Network sharing is disabled on some host machines. The object detection and image classification examples support offline dependency install.
Host machine requirements:
- Network-connected
git(optional)- ADB
Follow these steps:
- On the host machine, download sl2610-examples as a zip file or clone with
gitand compress to a zip file to make the transfer easier (e.g.zip -r sl2610-examples-main.zip sl2610-examples). - Copy with ADB:
adb push sl2610-examples-main.zip /home/root/
Follow the instructions in the top level README.md to get started. See offline dependency installation.
Next steps
Ready to go deeper? Once you have gotten started, visit the full User Guide for comprehensive details on advanced hardware configuration, deep-dive software setups, and full technical specifications.